Does starting your own seeds seem too intimidating for a beginner gardener? Sure, germinating and caring for seedlings it is a little more challenging than some might think. But it doesn’t have to be complicated either! Read on to find out what you need to sprout or germinate seeds and grow vegetable seedlings successfully—and simply.
Note: because of recent events, many online seed suppliers are running low or selling out, but Botanical Interests and MIGardener still seem to have a good amount for now.
Find out more about when to start seeds and garden in this post about planting dates. In general, start spring seeds about 6-8 weeks before you want to plant them (or a little more if you think they’ll take a while germinating). This post contains affiliate links for your convenience.
For the best chances of success, don’t skip a step!!!
1. The Right Seeds
This page has an updated list of online seed stores that still have stock with this spring’s increased demand.
First, choose seeds that are appropriate for the time of year you are planning for: cool season gardening, or summer gardening? (Read more on that and planting dates here.) You can also check the seed packet for suggested planting dates for your area (they won’t be exact).
Second, you may be surprised to know that for some vegetables, it’s not necessary or preferred to germinate seeds indoors. Based off of “Clyde’s Garden Planner” from my planting date post (as well as my own opinion and experiences), here’s what should and shouldn’t be started indoors. In general, it’s best to germinate seeds 6-8 weeks before their planned planting date.

For a Cool Season Garden, it’s best to germinate seeds of cabbage, cauliflower, broccoli, and lettuce should be started indoors. Onions, peas, spinach, root veggies (radish, turnip, carrots, beets), and chard generally do better germinating directly in the garden from seed.
For a warm season garden, it’s best to germinate seeds of tomatoes, squash, cucumbers, melons, peppers, and pumpkin seeds indoors. Squash and pumpkin seeds also do well germinating and growing directly in the garden if you prefer. Corn and beans do best planted directly in the garden as seeds, but corn does love warm soil for germinating.
If you’re a beginning gardener, I recommend choosing seeds that have the shortest “days to harvest/maturity” as you can find. You can find some good seeds online (like here) but some places are short stocked with the recent surge in popularity of gardening! The link below is one good company with lots of heirloom, organic, and non-gmo choices.

Germinating seeds in water–is it necessary?
Some gardeners like to germinate seeds before they put them in the soil. While it may be a good option if you have old seeds that you think may not sprout, to me it seems like an extra, unnecessary step in most cases. If you are not careful, you can break the little root sprout and kill the plant. However, for some vegetables, soaking the seed for a few hours can help to germinate seeds faster. Beans and peas are commonly soaked for 4 to 12 hours to speed up germinating.
2. The Right Soil Mix for Germinating
Finding the best soil for germinating plant seeds may be trial and error for you. You definitely should not use dirt straight out of your yard. You need to buy bagged soil mix that is designed for potted plants or to germinate seeds. New, clean, sterile soil that drains well will help prevent a problem called “damping off” where seedlings die from fungal disease soon after germinating.
Many store sell “seed starting mix” or seed starting pellets. Typically this is not much more than a more expensive version of peat moss or lightweight potting soil. Can you start seeds in potting soil? Usually, yes.
Personally I have had good luck using regular (good quality) potting mix. Cheap potting mixes that are mostly wood chips do not work well to germinate seeds. If the potting mix has a lot of wood chips, it’s best to filter them out. I like to use a mix that has enough peat moss or coco coir to help hold moisture levels just right.
Please note that some soils on Amazon may be out of stock due to current events but you can still find some supplies like soil and seed starting supplies at Home Depot online, even for delivery.
Most seed starting mixes have three important parts (some only have the first two):
- peat moss or coir which is soft, fine, and fluffy to hold moisture (some seed starting kits use peat pellets only: they work okay but might get too soggy).
- vermiculite or perlite (the little white pieces) to allow air to the roots and help drainage
- compost or plant food/fertilizer, which provides nutrients to help the plants grow stronger after germinating. If your compost or potting soil has lots of larger pieces of wood chips etc, it probably won’t work well to germinate seeds (straining out the big pieces helps).
If your mix does not contain compost or fertilizer, it helps to add a small amount once the seedlings have grown a bit and produced their second set of leaves (first set of “true” leaves). This page has a good tutorial on mixing your own seed starting mix if you’d like.
You want your seed mix to stay slightly moist, but not soggy since too much water can damage the seeds or seedlings.
3. The Right Container
There are lots of different options for seed starting containers. You may find the little peat pellets that expand in mesh or in peat/paper pots. Peat pellets are convenient, but sometimes don’t work as well for new gardeners since they can stay too soggy and don’t have any added nutrients to help seedlings keep growing.
Your seed starting container will usually consist of at least two parts: the inner pots or plastic cells that hold the soil, and an outer tray or container on the bottom that holds the water. This system of watering the plants from the bottom helps the roots to grow downwards and strengthen the plants. However, make sure they’re not soaking in a puddle of water all the time. You can use a similar method with peat pots or cups with holes in the bottom by setting them in a big flat tupperware tray together.
The set of ten trays in the affiliate link above looks great to me, especially for beginners. I like that you can choose your own soil for it and that the trays aren’t too big to move around or keep on your windowsill. The lid vent is a good idea to prevent too much humidity buildup inside.
I prefer to start with a container that has smaller holes or cells, especially for small seeds like tomatoes that grow upwards. This will allow you to transplant sooner. The only downside is that the pots may dry out quicker, and of course larger plants like squash will need a bit more room.
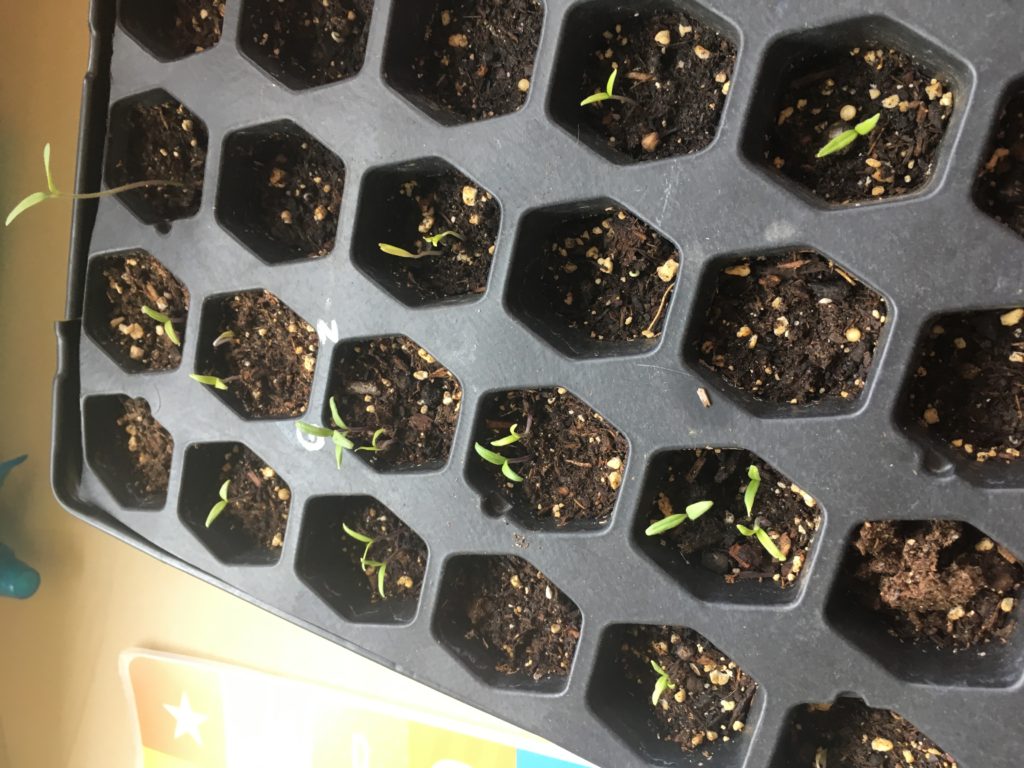
4. The Right Number & Depth
How deep should you plant your seeds? The answer matters! If you plant too deep, the seeds may rot before they see daylight. If you plant too shallow, seeds might get disturbed during germinating or fail to grow roots as well.
Often a seed packet will tell you the the correct depth for each seed. An easy rule of thumb, though, is to plant the seeds twice as deep as they are wide.
How many seeds should you plant per hole/cell? Many people plant three or more, but this is usually not necessary since most of those seeds will end up germinating. I prefer to avoid waste by planting only one or two seeds per cell. If there are gaps that need filling, I can re-plant as needed once the other seeds have sprouted.
If seeding directly in the garden, here is a cool little gadget to help you know the perfect spacing for different types of plants. It is based off of square foot gardening spacing.

5. The Right Moisture Level
Once you have planted your seeds, probably the most important and primary thing you have to do for their survival is to keep them perfectly watered! You want to keep the soil damp but not saturated. Soggy soil can kill seedlings just as easily as dry soil! Soil that is too wet is a common cause of “damping off” which causes seedlings to die after germinating.
Another way to help prevent early seedling death by “damping off” is to make sure your seedlings get a little light air circulation. This means you probably should not keep them tightly sealed in under a clear greenhouse lid after germinating. You might even even put a small fan nearby—a little air circulation helps them grow stronger and stay healthy.
6. The Right Temperatures & Light
Did you know that different vegetable plants have different soil temperature needs to germinate seeds? If you’ve ever wondered why your seeds aren’t germinating, maybe temperature was the problem. Peppers are one seed type that are known for needing warmer soil temperatures for germinating–even as high as 85 degrees! Many summer crops like 70 degree Fahrenheit soil or even higher for optimum germination.
If you have trouble keeping your seed trays warm enough, you can use a heat mat like this. The heat mat can also be used for helping bread rise or making kombucha. But please, do not use heat mats for cool season crops, and for most seedlings (except maybe peppers or okra), it’s best to turn them off after germinating.
Do seedlings need light?
If you have a good sunny spot for them near a window that gets several hours of bright, direct sun each day, your seedlings should do fine without extra lights. The main problem you may deal with is that some plants may get “leggy,” or become tall and skinny in search of more light. For some plants like tomatoes, this problem can be fixed in part by simply adding more soil to support the stem. But if they are too leggy, you will be better off getting them more light. If plants are leggy even under grow lights, move the lights closer to the plants.
Especially if you don’t use extra lighting, pay close attention to this last step below!
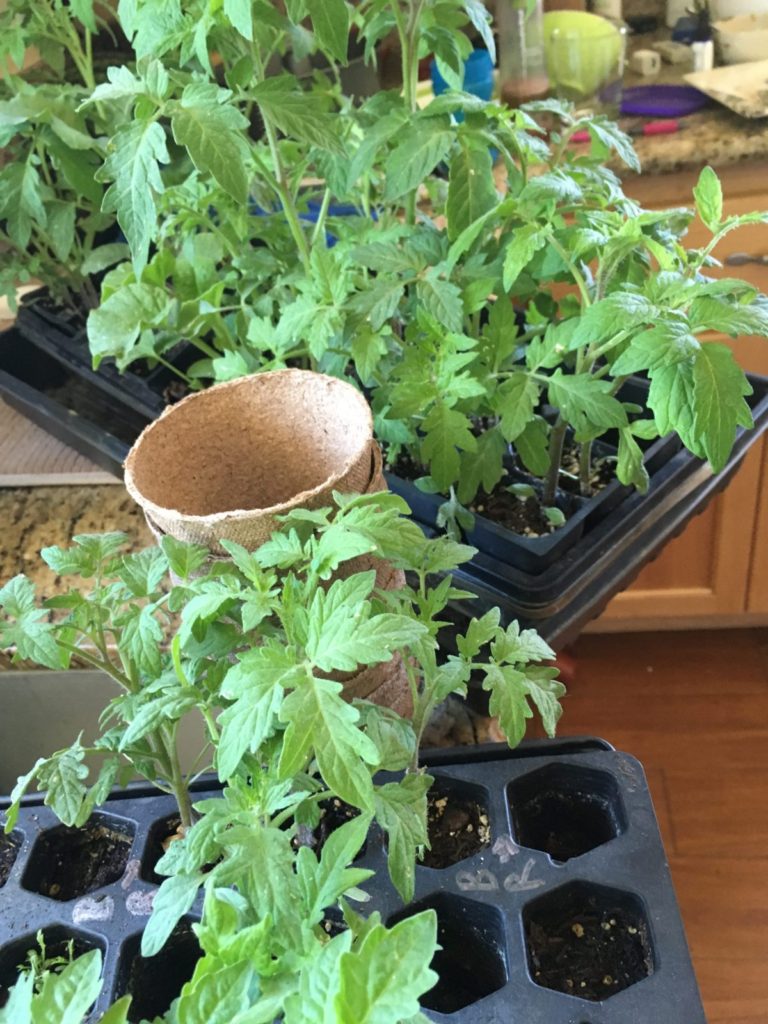
7. The Right Transition
Before you transplant, it’s important to prepare your seedlings for the transition gradually. Chances are they’re used to being babied and aren’t quite ready for the shock of the real world!
First, make sure you have the correct planting dates so they don’t get too cold. If there is still a chance of weather damage, be prepared to protect them with a bucket, cloche, or wall-o-water. But believe it or not, you also need to be wary of sun burn!
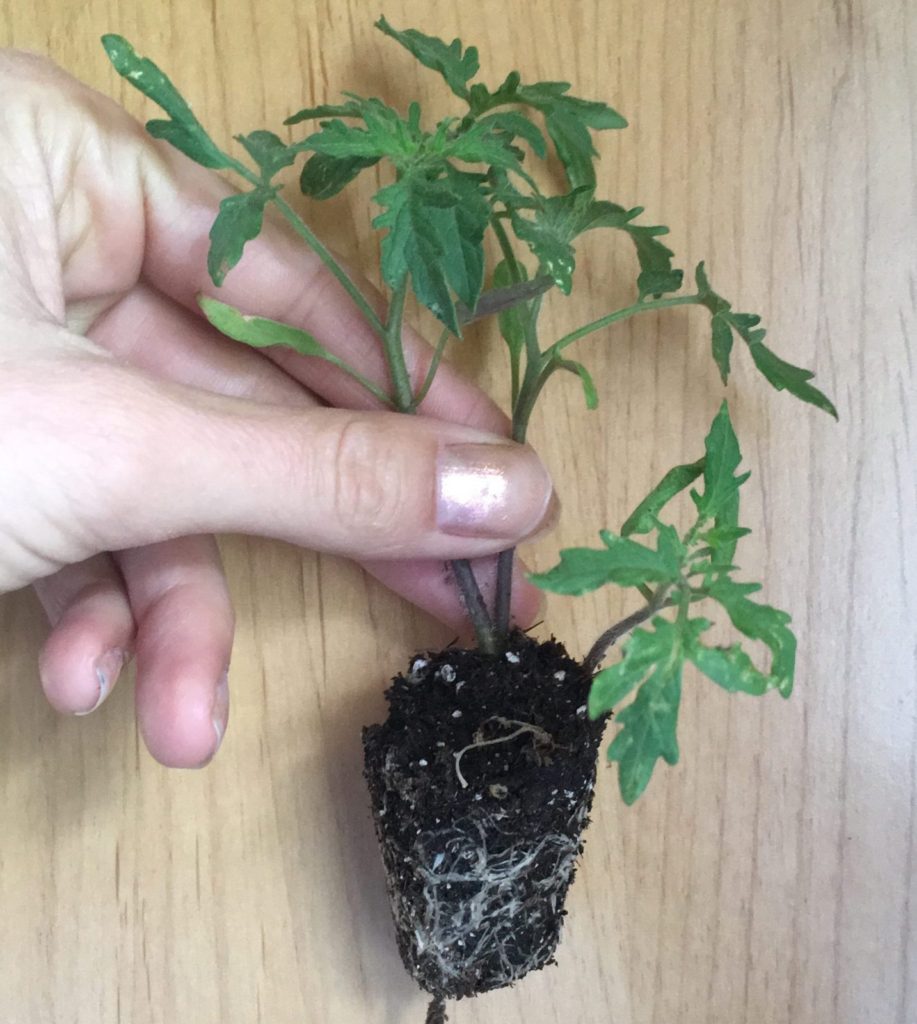
Begin setting your seedlings out for a little while each day so that they can get used to real sun and wind. Place them in a clear storage bin at first if your location is as windy as mine. Give them at least a week or two of gradually increasing their time outside in the direct sun before planting them in the garden. Especially if they’re root bound or big for their pots, be careful that they don’t dry out! But even if they do wilt, you might be surprised to find that they will often perk back up once you’ve taken them back in and watered them.
In addition to wind, sun, and cold, be prepared to prevent pest damage. Smaller seedlings are particularly vulnerable to insects, so sprinkling them generously with diatomaceous earth is a good idea. One year I was surprised to find my tiny tomato seedlings mowed to the ground by pill bugs, of all things!
Read more about organic pest control options here.
Epsom salts dissolved in water is said to help ease transplant shock; pour on little if you’d like once you’ve planted them in the garden. I also recommend a little boost of fertilizer once they’re happily planted.